Sunday, March 9, 2014

D.I.Y. with a Nutella Jar

Hi! so i know it has been sooooo long since i did a blog post and i promised that i would post every single Wednesday, but i couldn't, i was on vacation and i went somewhere with no tv, radio and even phone service, so as you may noticed i had no internet, but i really enjoyed it, never thought i'd be ok with an entire week of no internet, i know it sounds like i am an internet obsessed, but it's true, i mean i need internet to talk to my friends and watch videos on YouTube and stuff, but the place i was is the most beautiful place on earth hahahah i'm exaggerating but it's amazing. Also it is proven that my schedule didn't work so i'm kinda dropping it, but i guess i try to post as much as i can, i don't think i'll have enough time because this year as i'm a senior, at the end of the year i have to do a test to get into college, so i have to really focus on school.

So when i decided to post again, i couldn't just post something average, i have to do something cool. There was this empty jar of nutella in my house and all this ideas came to my mind and this is the result of it, which i have to say i'm very happy with it. So what you'll need is:


1.- A bottle of water.
2.- Clean and obviously empty jar of Nutella.
3.- Food coloring (optional)
4.- Water pearls.
5.- Flowers (forgot to put it hahaha)

The reason because you need that amount of water it's because in the package it said that you need 150 ml per pearl, also i read that distilled water is the best to do this. The food coloring is to give a little color to the balls, but they sell this pearls in some colors and if you're planning to use white roses i would recommend it as they will probably dye blue. This pearls are really cheap, mine cost like 1,5 dollars, they may seem a few but keep in mind that they grow. You can get them in a flower shop or Amazon.

Let's begin! so the first thing is to add food color to the water.


I added about 10 drops and the pearls ended up looking like marbles. So obviously the more you add the darker. Next you have to add the pearls, you need about 20-30, it depends on the water that you used, if it is distilled water you may need 20, if it is tap water, 30.


Leave them there for about 8 hours so let them fully grow.
Now it's time to pick your favorite flower or make a small bouquet, also you can use synthetic flowers. I picked up some from my garden.

To keep the way you want them to be secure them with and elastic, and then to cover it use a ribbon. If you have more artistic abilities, not like me hahhaah, you can make a cute ribbon or a bow.
And that's it, now you have to put the pearls and the flowers in your jar you're done! It's so easy and it looks so good! I put mine in my bedside table.
But wait this is not the end, i had another idea. You just need some acrylic paint. Choose your favorite colors and a pattern if you want, here a some of them.


Begin by painting the whole jar, you can paint on the outside, but if want, you can paint on the inside and do the pattern on the outside, it looks so cool, like a 3D effect.

Let it dry. If you use regular pain i recommend to wait a few hours.


So what if the design you were doing didn't turned out the way you wanted it? There is an easy solution to that! just dip the jar in hot water for about 3 minutes and then the acrylic paint will peel easily.

I mean look at that, the design what horrible and it was so easy so remove, you don't even need a razor like some people say. 
Once you are happy with the result you can use it as a pen or pencil holder, makeup brush holder, you can put a candle inside, whatever you want.

That's it, i hope you like this post and if you what me to make another one like this, just leave me a comment.
Love,


post signature

Wednesday, February 19, 2014

Haul: Essence and TRESemmé


It's Wednesday! so this mean 2 things, first, it's blog post day! and second i didn't missed my own schedule! so i'm very happy about that. Today's post is about things that i recently bought (yup, guilty again hahah) and basically are for nails. I've already done a review about an essence product, which is a pen, you can check it out in my previous post. I really love essence products, they are cheap and really good, so they're definitely worth every penny.
So i'm going to show you what i got
1.- It's a nail polish remover, i know that for some of you it isn't worth to mention, but i do have to tell you my experience, my mom doesn't care about nails at all, so she buys very cheap things therefore bad quality things, to be exact the nail polish remover that she buys cost 2 dollars, is the cheapest. When i used this on my nails, the were really damaged and it had a really strong smell. This nail polish remover is really good, i used just a little bit and it removed almost all the polish, and it has a really good smell. The best part is that it costs like 3,5 dollars.
2.- A nail art kit, it comes with a brush and some sponges to do the ombré effect on your nails, the brush is really thin to do some lines and if you put a little bit you can make some dots.
3.- Some nail Decorations, i've seen some really pretty nails with glitter and i love them, so i bought this to try them on my nails. I'm going to try this one. It's from an instagram account called loud and lavish. (i'll put all the link when i get home, because my internet here is really crappy hahaha)
 
4.- Tweezers! i really needed a new one, and this one is really good, i can plug every single hair of my eyebrows. I realized they look like the tweezerman's tweezers.
5.- Eye shadow applicators, i didn't have any to be honest and since i was in the store and i bought some eye shadows, i just had to. Just a little bad thing, i felt like the eye shadow stayed in this rather than my lid.
6.- Eye shadows, so here's a little palette (i don't know if i can call it like that) as you can see I've already used it and it creates a beautiful smokey eye, which i'll show you in my next post. It's really pretty!
7.- Top coat, i read somewhere that this helps to prevent chipping, and this always happens to me! also it's a quick dry topcoat, so you just have to wait a few minutes and as you may know, i'm very clumsy, so this is perfect for me.
Also when i was at the supermaket i saw this, is a heat protector, and i read many times that TRESemmé is the best, so i had to try it. I always use my flat iron, so my hair is really damaged and in winter is worst, i blowdry it and then i use my flat iron. I've used this like twice and it's really good, my hair is softer, i love it!
So that's it, i hope you liked this week's post and i'm sorry if this post is up on thursday on your country, the internet here is really bad, on my last post it took me like an hour just to upload the photos. And today the service has been down for almost 2 hours, ugh! this what you get when you go to a small town here in chile.
Love,
post signature

Thursday, February 13, 2014

Review: Models own - Blueberry Muffin


So apparently I've failed my own schedule, good one meli, i'm sorry but yesterday it was the day i was going to the beach, that meant 5 hours of car traveling and let me tell you that i have traveling by car, it makes me feel very sick throughout the journey, like the feeling you have when you're about to vomit, that one, ugh i hate it. So yesterday was like a short day for me and also to be complete honest with you i forgot, i'm so sorry! i promise it won't happen again. Here's a selfie hahaha i was soooo bored while i was in the car.


So lets get into today's subject, models own  "blueberry muffin" nail polish. I was so excited when i ordered this, because in my country this weren't available and i really wanted some pastel nail polish, I've seen they're going to be on trend again for spring, but as in my country is currently summer i get to use them now, ha!
This is a beautiful blue pastel polish and is part of the models own pastel collection, they have other 5 shades. When i was buying them, i forgot to search reviews of them online and i did that like the day after i bought it, and mostly everyone said that the formula wasn't very good and a bit patchy. I was hoping that this won't happen to me (silly me) and it did, sorta. i think once you know how to apply it you can achieve great results, so just give it a try! 
What i decided to do for a demonstration, is that i'm going to show you every coat that a applied. Also i tried it with a white coat as a base, so you can check both out. First is just the polish applied.
Then here's with white polish as a base.

As you can see by the second coat my clumsiness had already arrived hahaha but you can fix this must my corrector pen (Is on one of the previous post). I think a prefer with a white base, i think the color stands out more.
Also it says that is scented, and this totally amazed me, but sadly i couldn't smell anything. But you can scratch the top of the cap and smell it, it smells like candy. Anyway i think it's a gorgeous shade and  love blue so i'm happy with it.(p.s Blue is my favorite color)
Here's a couple of pictures of the polish.

Well i hope you like this post and hopefully you can forgive me for my delay :) Leave a comment if you liked it and i have another one, so i can do the same with the other shade I've got.
Love,
post signature

Sunday, February 9, 2014

What i've been up to: Shopping, Macarons & Beach!

Before starting writing this post, i want to announce something, as this blogging-thingy requires constancy and i'm currently on vacation, so no school, yay! and this usually meant free time, but as you may know i was sick last month, but not just one week or two, THE WHOLE MONTH, really i'm not lying, this chicken pox thing started the 4th of January and i was just kind of acceptable by the end of the month, total waste of time :(.
So during that month i couldn't see anybody but my mom, so when i got better everyone wanted to see me (i don't want to seem popular, i'm really not hahaha) so the last few weeks I've been with my friends and family, and a little shopping (yup, guilty). I just felt you needed a little explanation, so as a solution of this lack of post, i decided to put a schedule (also another reason is that i'm going to the beach which means no internet, but don't worry,  there will be one, so keep reading). Every Wednesday there's going to be a post and maybe some Saturdays also. So remember to visit my blog every Wednesday for a new blog post :)
Let's get into what this blog post is really about, basically shopping hahahah. I do have to tell you that i never ever ever have money to spend on myself, so this week has been like living in heaven, and the reason of this is really odd for me, my dad gave me money to spend on my vacay, i was going to the beach with my friends but it ended up being a major fail, apparently my year hasn't started very well. Anyway, i'm sure there will be amazing things for me this year.

So the first thing i wanted to do when i got better was going to the mall, and i was craving a lipstick, to be more exact, Too Faced La Crème. I bought the shade Razzle Dazzle Rose.
It's sooo pretty, i'm sorry i forgot to take a picture of this one in my lips, i guess i have to upload it later. I'm in love with it, it reminds me of a barbie, you know, the doll (what else, duh) it's like a bright pink, i think it's on trend right now or maybe not hahahha.

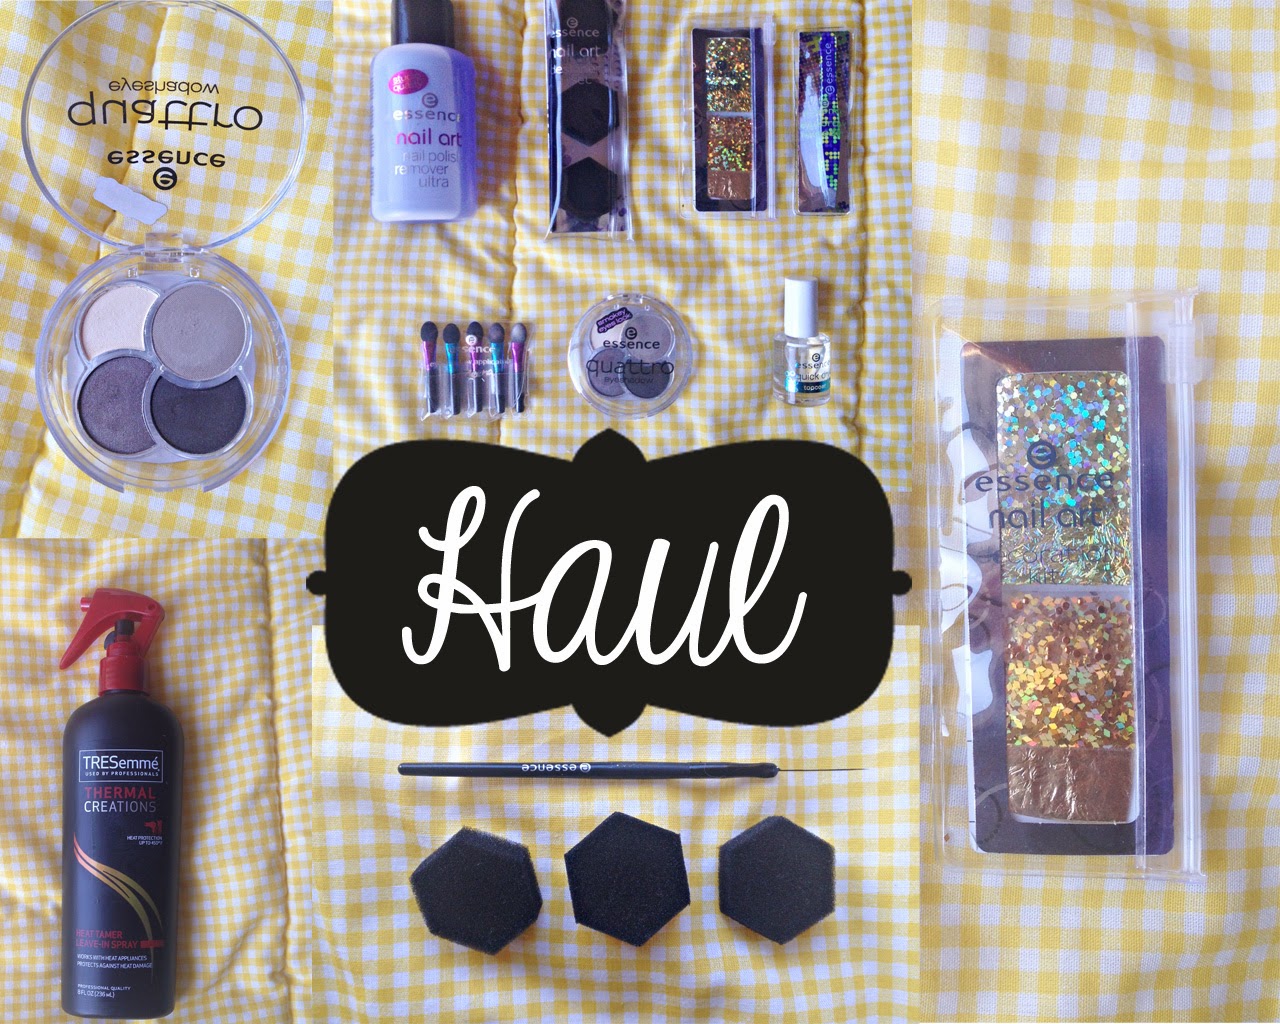
Next, there are 4 things, which some of them i like, love or kinda hate.

1.- Not Your Mothers, knotty to nice detangler. It was on sale so i had to buy it. a little advice on this one. DON'T use too much! you just have to apply a little bit, the first time i used it i put a lot on my hair and my hair  was just awful and gooey, but i didn't gave up, the next day i decided to give it another try, but i apply it just a little bit in the back of my head, because i always have knots there, and it worked, kinda, hahah i'm still experimenting with this one, we have a love-hate relationship.

2.- Garnier - BB Cream. I've heard so many amazing things about this one i just had to buy it and they have a version for oily skin, which is perfect for me. I've used a couple of times as my skin is still in recovery from chicken pox. It gives pretty much a light coverage, i really don't want to start using foundation, i'm kinda scared of it, so i'm pleased with this one. 

3.- Sunglasses. So in my country is summer, and it's like the "end" of the season for the stores, as they are starting to sell school stuff boo, even though were are still on summer. Anyway, this two had 50% off, i'm not going to tell you the brand of this as they only sell this only in Chile, i believe, i'm sorry i always try to show you things anyone can get, like worldwide.

4.- Goody - Elastics. So i know this isn't so important to show but there's a little advice from me, since i was little my mom bought cheap elastics and they only last for 2 days, so when i had money to buy my own stuff i invested in this. The first time i bought them they lasted for 1 and a half year, believe it or not. So do that :)

So now let's move to clothes, first i'm going to show you a dress i'm in love with and it was super cheap, 75% off Ah-mazing! 

It's sooo pretty, but again is from a brand only available in Chile, sorry! But don't be so sad, i searched in forever 21, so check out this similar dresses 12345678. Another thing i bought it's a sweater from H&M, i think it's perfect for the beach, because it neither too thick or too thin, i love it! Take a look 

Sorry i couldn't take another photo, i'm going to try to take one of me using it hahah. As you can see it's longer at the back, which i really like.

Ok, so here is my attempt to make this shoes

Be white, which was a complete fail, i used bleach i they turned in to a yellowy-greeny color. not what i wanted.

I think i totally messed it up, any suggestions to fix this?

Finally we have reach the best part of this post, Macarons!
It's time for another story, my story with macarons, be prepared. So the first time i travelled to paris was like 4 years ago, it was amazing, but i didn't meet these beauties until i was leaving Paris (i'm so dumb!) I was at the airport and they have this Ladureé Store, and i look at these beautiful, colorful cookies and luckily i had some euros left so i bought a box as a present for my family. 17 hours later (yes, that's how far paris is from my country, it sucks) i arrived home and that was the moment i fell in love with macarons, they were so delicious and soft and so .. i can't even explain it to you, you have to try it, and if you have you'll know what i mean.
I was obsessed with these and nobody (at that time) sold these in my country, so i was determined so make them, also my sister was involved in this as she fell in love too! So we bought all the ingredients and try to make them, complete fail, and we tried and tried, until i gave up. I kept like this until a few days ago this obsession came back, so i looked over the internet and i always liked the videos from a page called Joy of baking she makes amazing recipes! so definitely check her out, she also makes YouTube videos which make it easier. So she made this post which is awesome, she shows you every step in the video and i tried it and it worked! i was soooo happy, it was the first time my attempt was successful, yay! look at them

Successfully delicious!

If you are interested in some tips which really make the difference, here are some:
  • Must haves: oven thermometer, you can buy from amazon here. I bought mine from a store here and it cost like 10 dollars, believe me it's really worth it and important! Another thing is a food scale, this is absolutely necessary, you have to be precise, then again in amazon you can find really cheap ones, check it out here, or even if amazon it's kind of expensive for you, in terms of shipping, there is always a kitchen ware store, the scale that i use i inherited from my grandma. And lastly a food processor, if your local supermarket doesn't sell almond flour (like in my case) you can make your own by grinding almonds, it's really easy. (I recommend peeled almonds)
  • Not really necessary: so everyone who makes cooking videos use kitchenaids or that types of mixers, but i did it with a hand mixer, even though your arm gets a bit tired, you can still achieve the same result, of course kitchenaids are so helpful but i don't have 300 dollars or something to spend. Silpats, these are amazing but somewhat expensive as well, you can use parchment paper, it works really well, the only difference is that silpats gives to the macarons a shiny bottom, on the other hand, on the parchment paper, a little part of the cookie sticks to the paper.
  • Other important tips: Sieve everything, even twice, the more you sieve the more blended it is and you avoid lumps. Be patient, when you are done pipping wait 30 minutes or even an hour, this part of the recipe it's important! Also when you get them out of the oven wait a little bit, like 5 to 10 minutes to let them cool down, if you try to get them out, even on a silpat, you'll crack them, you'll separate the "foot" (which is the bottom part of the cookie, the one with bubbles) from the top part. if you wait you can easily get them out.
Hope this tips are helpful and maybe i motivated you to make these delicious cookies. You can do it!

I'm sorry this post is so long, but i promise we're getting to the end, as i told you at the beginning i'm going to the beach. I always go to a small town in the north of chile, i've been going there for vacation for 17 years (yup, my whole life, and my family has for 25) here's a photo

Really beautiful huh?
I love it plus is super relaxing as nobody goes there.

Lastly, my family wanted to a little plant vegetables in our yard, so i have tomatoes, zucchinis, onions, potatoes and many more things, so this is what i harvested. 


Also i have some peppers

 Some potatoes

Some basil

And some grapes


 I do want to point out that the zucchinis were gigantic, i mean look at this photo, the one from the right is a normal one


And while i was doing this, this one was asking for food as always, if you want to know more about him, his name is Joaquin, he is super fat because he only eats and sleep and is super grumpy.


So thats everything, i feel like i just vomited my life in this post hahaha, it's a long post so if you survived until here, congratulations! You have survived the longest post ever! hope you enjoyed it, i know it wasn't all beauty-related, but i just wanted to tell you some things.
Love,

post signature

Sunday, February 2, 2014

Review: O.P.I Avojuice Creams

So a couple of days ago i was asked to a review of the O.P.I Avojuice creams, which made a little appearance in one of my previous post (you can check it out here) So here it is, I've got 3 creams but there are about 10 different types. Take a look
Sorry about the bad quality of this image, it's the best one i found on google.
The ones i own are mango, cran &  berry and jasmine. And basically i thought i would do this review based on 4 categories: smell, hydration,  thickness and price. You can find this creams in different sizes, there's this little ones i just showed you, which are perfect to carry around on your handbag, and a bigger one, which i think you should keep in your bathroom.

Let's begin with the categories
Smell: Cran & berry is definitely my favorite, the frangance of this one is just incredible, is the one i use the most. Jasmine has a flowery scent (of course) i really don't know how to describe it but the word that comes to my mind is soft, i feel like cran & berry has a more powerful odor. And lastly, Mango, I'm very sorry to tell you i don't really like this one, i mean if you have ever eaten a mango, the scent of this one is nothing like a mango, it reminds me more of a peach. Another thing i want to tell you is that even though they smell amazing, this doesn't last very long in your skin, when i use creams i want the fragrance of the cream to stay in my skin (do you understand what i mean?)

Hydration: In winter my hands are so dry, they even "break" sometimes because of the cold weather, so i always use this cream. As soon as i use it my hands are soft again, so i definitely recommend it if you have dry skin.

Thickness: This cream is very light, your skin will absorb it instantly and it doesn't give you that gooey finish that some creams give, like a body butter.

Price: So in my country the little ones cost like 2 dollars and the big one like 12 or something. i do have to tell you that some things in my country are double or even three times more expensive compared to other countries, so maybe it's cheaper in yours. For the little ones i think is a good price, but for the bigger one, i prefer spending a lit bit more money an buy a Victoria's Secret or maybe one from the body shop.

Here's a picture of the creams in my hand so you can the color and texture.


I hope you like my review, please leave a comment if you want a review on another product. Remember that you can follow me on BloglovinTwitterInstagramTumblr and Pinterest. All the links are on the top of my sidebar.

Love,
post signature